Friday, March 20, 2015

Easter Preparations


Every year for Easter we head out to Long Island to visit my husband's family. They do an amazing Easter party on their block where all the kids participate in a huge Easter egg hunt. One of the neighbors dresses up as the Easter bunny, contests are held, and prizes given out for finding special eggs.

This year is extra special because it is the first year that we have our own little bunny! Of course she will be spending the day in our arms rather than running across lawns and gathering eggs, but we can still get into the spirit. 

Below are some non-edible ideas for loading up those Easter baskets, although candy and Peeps are always a welcome choice.


Check out this idea from All Kids Network. You create your own puzzle and then fill Easter eggs with a few pieces. It is such a great idea for a family egg hunt, with a great surprise at the end. It's also a good way to make sure you haven't left any eggs in the yard.


What does your Easter bunny leave?


Tuesday, March 17, 2015

How to Shoot in Manual Post: Part 3 Freezing Action


So how do you capture a laugh, a jump, or any action with your camera? The short answer is by controlling the shutter speed.

Shutter Speed

What is shutter speed and why is it important?
Think of your camera lens like a human eye. The shutter speed is how fast or slow the lens "blinks".
When the camera lens is open, it "sees" your subject and all the light around it.
When the camera lens shuts all the information is compressed into 1 picture.
Shutter speed is a measurement of how fast the lens shuts. This controls how much light and how much information gets recorded on that image.

When would you want a fast shutter speed?
A fast shutter speed like 1/200 (1/200th of  a second!)  means the lens is only open for a short amount of time. A lower amount of light can get in during that time( making the image darker), but it also only captures only what happened during that brief moment in time. This helps to "freeze" action.

In the image below, my handsome nephew was on the swings. He was swinging up and down and laughing. I needed to freeze that action with a fast shutter speed. Otherwise it would look like a blurry mess.  I then had to adjust the other 2 settings (Apeture & ISO) to compensate and add light back into my image. In general, I try not to go below 1/100 when shooting people.


When do you want a slow shutter speed?

If you are photographing a still object, a slower shutter speed will allow you to get a brighter image. However, you have to be careful not to make it too slow. We naturally move a little when holding the camera and just a slight movement (think inhale, exhale) can result in blurry images if the shutter speed is slow. A solution to this is using a tripod or monopod. This helps steady the camera and reduce shake. In the image below I was able to use a slower shutter speed because my object wasn't moving. However, if it was a windy day, this would not have worked.
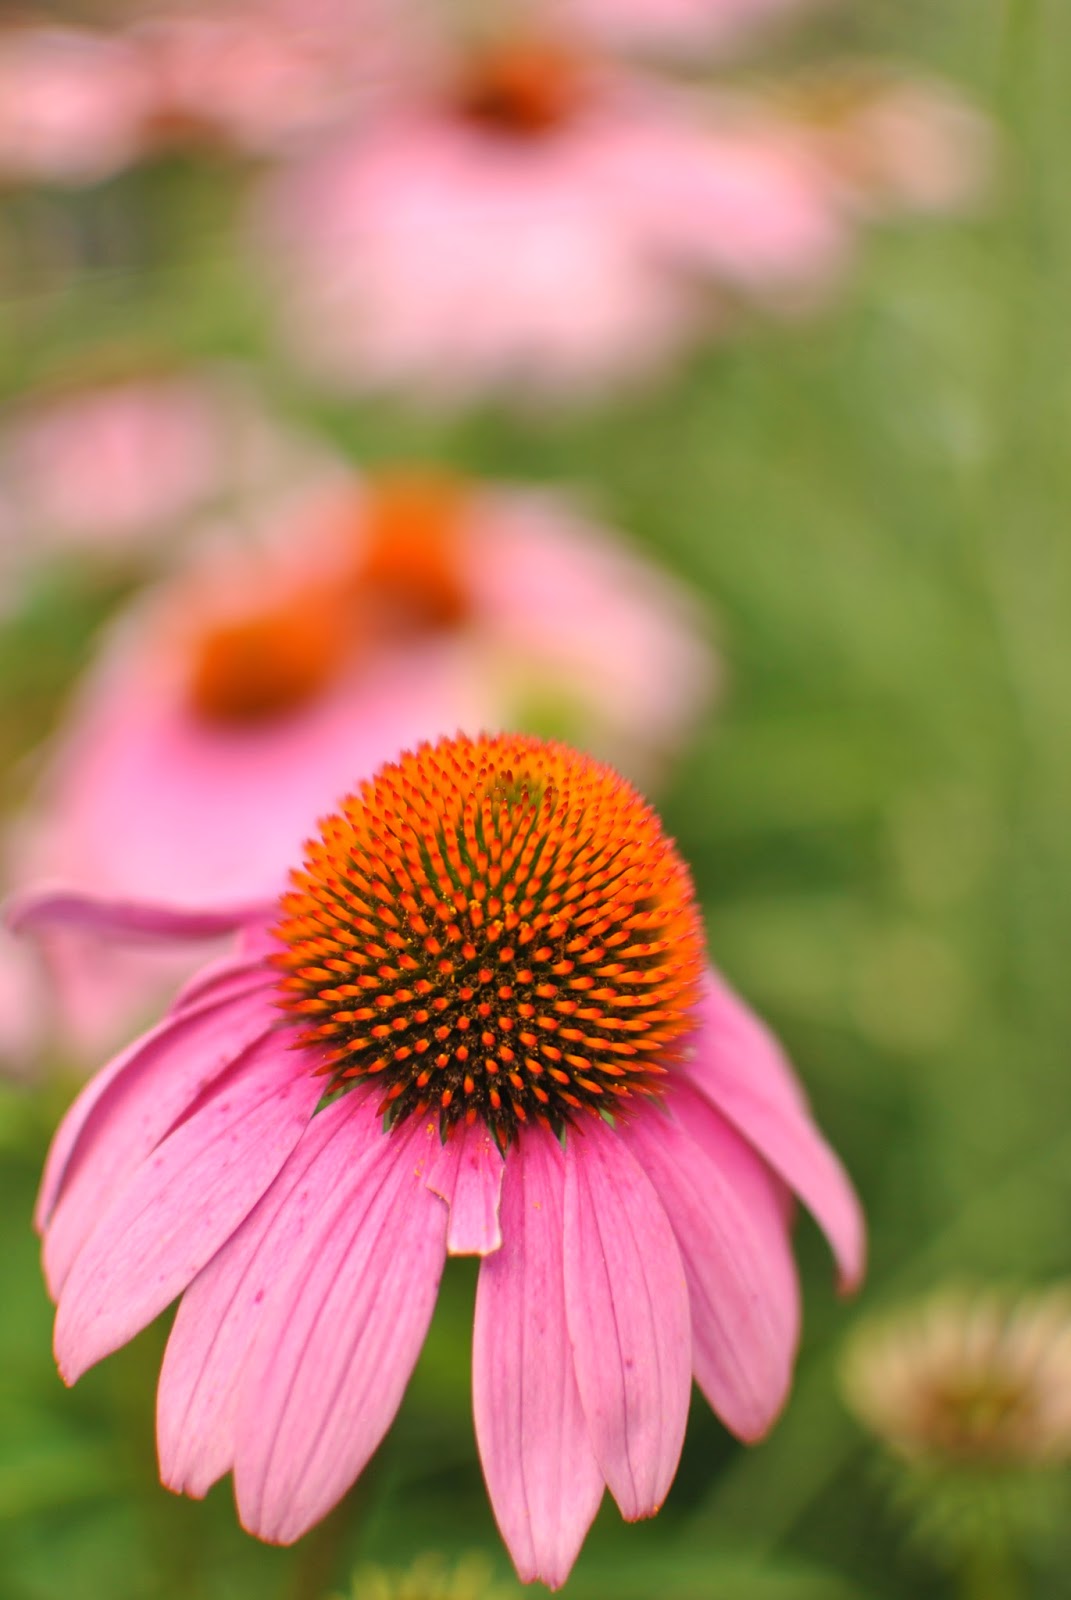

To get a blurry background like this I used an aperture of f1.8

ISO

ISO is a measure of your camera's sensitivity to light. You can adjust your camera's ISO setting to add or subtract light from your pictures. It sounds simple, and it is, but there is a catch. When you use a high ISO, it introduces "noise" into your pictures. This means your pictures taken with high ISO will be brighter, but will have a grainy look rather than a smooth appearance.

When would you want a high/low ISO?
When shooting outside during the day you can usually set your ISO to a low number like 200. When shooting indoors, I usually shoot using at least 800, and sometimes up to 6400! If I did not increase the ISO, I would have to bring the shutter speed down so slow that my pictures would be blurry. Higher end cameras allow you to use a higher ISO with minimal noise.


Putting it all together: Go Try Shooting in Manual

After learning about these 3 settings and messing around in priority modes, I felt like I understood what they meant and how to use them individually. However, when I switched to manual mode I didn't understand how I was supposed to know what needed to be adjusted. Then I learned about a nifty tool called a light meter or an exposure meter. This is on your camera. It might be on the top, on your screen, or in the viewfinder.


There is a zero in the middle. Your goal is to adjust the 3 settings so that your dial ends up on or close to zero. This means that your image will be correctly exposed.

When I shoot an object or a portrait,  I think about what settings are the most important to me.
First, I choose my ISO depending on where I am ( inside, outside) and how bright it is.
Next, I adjust my aperture because it is important to me that I get a blurred background.
Last, I look through my viewfinder and adjust the shutter speed so that my light meter reads at zero.
Finally, I do a few test shots. This shows me how the settings are performing together. If I find that the shutter is too slow, I make it faster and bump up my ISO instead.

This is Part 3 of the series, How to Shoot in Manual Mode. Click the links below for 


Friday, March 13, 2015

How-to Shoot in Manual Mode: Part 2 How to Get a Blurry Background


Photography is all about manipulating light to artistically capture moments. There are 3 settings on your camera that are used to manipulate light. Shooting in manual means that you will control all 3 of these settings. These are...

1. Aperture
2. Shutter Speed
3. ISO

Each of these settings does something different. However, all of these settings effect how light or dark a picture is. I hope to teach you how to adjust your settings to get your picture to look a certain way, and how to balance the 3 settings so that your picture is correctly exposed.

Aperture

Aperture is my favorite photography setting. In my opinion, it changes moments in time into art. It helps to tell a story.

Aperture is the setting on your camera that selects how much of the picture is clear or "in focus". Aperture is measured in "f-stops". Depending on your lens your f-stops will measure between f1.2- f22.

The lower the f-stop (1.2) the blurrier the background will be, and the smaller the focused area will be. A lower number also means a brighter photo.

A higher f-stop (22) will make all of your picture clear and in focus. It will also be a darker photo.


When would I want to use a low f-stop?
I shoot using a low aperture like 1.4 or 2.8 as often as I can. I love the look of a dreamy blurred background. I can get away with this tiny focus area when photographing one person, or an object. I will sometimes bump it up to 3.5 to get more of an area in focus, or when taking pictures of more than 1 person.

When do I want to use a high f-stop?
If you want everything in focus like your kids, and the grass, and trees behind them, choose a high f-stop. This will capture the details in everything. I also use a higher f-stop when photographing groups. This way everyone's face is in focus.


Go try:
Shooting in Aperture Priority mode. There is usually a dial on the top of your camera that says "A".Using this setting, you select the aperture using your menu or a dial and the camera will take care of everything else.  Every camera is different so check your manual for how to adjust the aperture on your camera.  Try shooting an object using the lowest aperture that you have. If you only have the lens that comes with your camera it is probably 3.5 - 4.5. Aim your camera to focus on your object and take your picture.
Then try adjusting your camera to a higher aperture like f11 or f22 and shoot the same picture. Play around with it.

Tuesday, March 10, 2015

How-to Shoot in Manual Mode: Part 1


I LOVE to take pictures. I am always taking pictures of my family and friends and rarely ever in the pictures. Since my daughter was born, I have been taking pictures non stop of her, and of her and my husband. I now realize that there are very few pictures of me and my daughter, besides the few on my husband's iPhone.

My mission now is to teach my husband to use my DSLR and thus this series begins.

What is a DSLR?
DSLR means digital single lens reflex, or the big clunky cameras you see photographers and tourists use. Lugging around a DSLR is not as convenient as pulling out your phone, but the picture quality is unmatched.

I made the jump to a DSLR after falling in love with the beautiful blurred background I would see in professional photography.I purchased my first DSLR about 5 years ago. It was the Nikon D3000 which is a lower end model and can be purchased now for around $160. The newer models offer great features like live viewing, video recording, and better low light performance, but the D3000 was a great place for me to try photography out before deciding to upgrade.

After researching online, I quickly began shooting in "Aperture Priority" mode. (Aperture is the feature that causes that blurry background.) Using this setting, you select the aperture, and the camera adjusts everything else automatically. It worked well sometimes. However, I would often get very dark pictures (underexposed) or pictures that were so light it was hard to make out what was in the picture (overexposed.)

I didn't know how to fix my problem, and camera lingo was very overwhelming. I put it off for a long time. About a year ago, I decided to learn how to shoot in manual mode, so I could control all of the settings myself. 

I have learned...
  • Light is what photography is all about. You need to adjust the settings to get the light to do what you want it to. Taking pictures in diffused natural sunlight is the most powerful and easiest thing you can do to make your photos look great. (Studio lamps and external flashes help, but nothing is as good as natural light)
  • A good lens is the second most important thing, but the choice is very personal. Think about what you're photographing, how blurry you want the background to be, how close you want to be to your subject, and if your okay with moving around to take pictures. Your camera model may also influence the lens' functionality. My old D3000 and most cameras that are under $2000, work using a crop sensor. ( For Nikons the camera will be labeled "DX") That means that the image you take will look like it's cropped, or you will be able to see and photograph a smaller area. Using this type of sensor, my 35mm lens works more like a 55mm lens. My 50mm lens crops out so much of the surroundings that it is hard to take pictures indoors, which is where I take most of my pictures. That lens only gets used outside where I have the space to back up far enough to capture it all.

You can get lucky with photography and capture some beautiful shots while in AUTO mode. However, you will miss plenty of moments because the pictures are too blurry or too dark or too light. If you want to have control of your images, you MUST shoot in manual mode.

In this series, I will attempt to pull out my inner kindergarten teacher and teach you what I know about photography and taking control of your pictures.  In the following posts, I will explain aperture, shutter speed, and ISO. This will include why they matter, how to adjust them to get the shot you want, and how to balance the three to get perfect exposure. 

If this post interests you and you really want to learn photography, I suggest you check out Megan Weaver. She is an amazing photographer in Dallas, and one of the nicest people I have ever chatted with. She is launching a free online photography course in the Spring that you can be a part of. I was lucky enough to get a chance to preview her course and it is definitely worth your time. She is so helpful and genuinely invested in your success. She also gives some great tips on shooting indoors on her blog.

If you have any questions leave them in a comment & I'll do my best to answer them.


Wednesday, March 4, 2015

FREE Printable St. Patrick's Day Signs


Below is a link to 4 signs that would be perfect to frame and use as decor this St. Patrick's Day. There are 4 signs total. Click the link below to download them all for FREE. 

The "Lucky" sign will print as an 8x10, The "Happy St. Patrick's Day" sign will print as a 5x7, and two versions of the "Irish Blessing" will print as a 4x6. 

stpatricksdaysignsfreeprintables.pdf


Sunday, March 1, 2015

DIY St. Patrick's Day Sign

For the last four years I have invited my family over for St. Patrick's Day dinner. It is the one holiday that is always at my house. We cook corned beef and cabbage, everyone wears green,  and the kids work on crafts. Last year we even created a photo booth with hilarious props. 

To make this sign you will need:
  • canvas
  • vinyl letters
  • green paint
  • gold glitter
  • Mod podge
  • freezer paper
  • large & thin paint brush
  • pencil