Showing posts with label Parties. Show all posts

Wednesday, March 4, 2015

FREE Printable St. Patrick's Day Signs


Below is a link to 4 signs that would be perfect to frame and use as decor this St. Patrick's Day. There are 4 signs total. Click the link below to download them all for FREE. 

The "Lucky" sign will print as an 8x10, The "Happy St. Patrick's Day" sign will print as a 5x7, and two versions of the "Irish Blessing" will print as a 4x6. 

stpatricksdaysignsfreeprintables.pdf


Sunday, March 1, 2015

DIY St. Patrick's Day Sign

For the last four years I have invited my family over for St. Patrick's Day dinner. It is the one holiday that is always at my house. We cook corned beef and cabbage, everyone wears green,  and the kids work on crafts. Last year we even created a photo booth with hilarious props. 

To make this sign you will need:
  • canvas
  • vinyl letters
  • green paint
  • gold glitter
  • Mod podge
  • freezer paper
  • large & thin paint brush
  • pencil


Friday, February 20, 2015

DIY Personalized Beach Pails


Personalized Beach Pails How to
how to beach pail personalized
At a relatively cheap price, you can create these personalized pails. They make great end of the year gifts for students or favors for birthday parties. The personalization is an easy and quick way to kick them up a notch. 
Supplies
  • Pails : The one used below came from the 99 cents store for $1.49. There is no reason to spend more. A plastic pail is a plastic pail. 
  • Elmer's Painters: I purchased these on Ebay in assorted colors. All craft stores sell them. 
* Keep wet and dry paper towels around to clean up mistakes. If you make a mistake (like I did) you can wipe off the paint right away and start over. 
Personalized Beach Pails
How to write names on beach pail

I gave these out to my second graders right before summer vacation. On each pail, I wrote the 
student's name and drew a picture. My co-teacher and I also filled the pails with books, and candy. The kids were so excited.


Friday, July 25, 2014

DIY Cupcake Toppers: Part 2: Assembly


Hello! This is part two of the cupcake topper tutorial. Here I will show you how to assemble the toppers you created in Part 1.


Supplies
  • Your printed designs from Part 1
  • Circle paper punch 1 3/8"
  • Scallop paper punch 2"
  • Glue
  • Scissor
  • Toothpicks
  • Construction paper or scrapbooking paper.


Step 1: Cut out everything. Using the circle paper punch, punch out your designs upside down. This provides more control when centering. Then punch out the scalloped circles. You will need 2 of these for each topper, and punch out any decorations you might use. Here I used Martha Stewart's ribbon bow punch.


Step 2: Glue your design onto the scalloped circle.
Step 3: Add glue and glue on your toothpick. Then use another scalloped circle to seal it making sure the two scalloped punches line up exactly. This will seal in/hide the toothpick and make your cupcake topper look pretty from any point of view.


If you have any questions, please comment below.

Wednesday, July 23, 2014

DIY Cupcake Toppers: Part 1

This is a tutorial for how-to create cupcake toppers for a celebration. You will learn how to use your computer to create the correct size and shaped text to be used to tailor make cupcake toppers for any occasion. These can be used for any holiday or celebration because you create the text or images you want. 

Supplies:
Part 1:
  • Your computer & printer
  • Microsoft Word
  • White paper or cardstock.
Part 2 ( Coming Soon)
  • Circle paper punch 1 3/8'
  • Scallop paper punch 2'
  • Glue
  • Scissor
  • Toothpicks
  • Construction paper or scrapbooking paper.


 Step 1: Open Up a Microsoft Word Document. Click on Insert> Shape> and click on the oval shape. Then move to your screen and click and draw your shape. 


Step 2: Adjust the size to fit your paper punch. My circle punch was 1 3/8 so I changed the diameter of the circle to be 1.45. This way, I can guarentee that I won't see the outline, but the text will be visible after it is cut out.

Wednesday, July 16, 2014

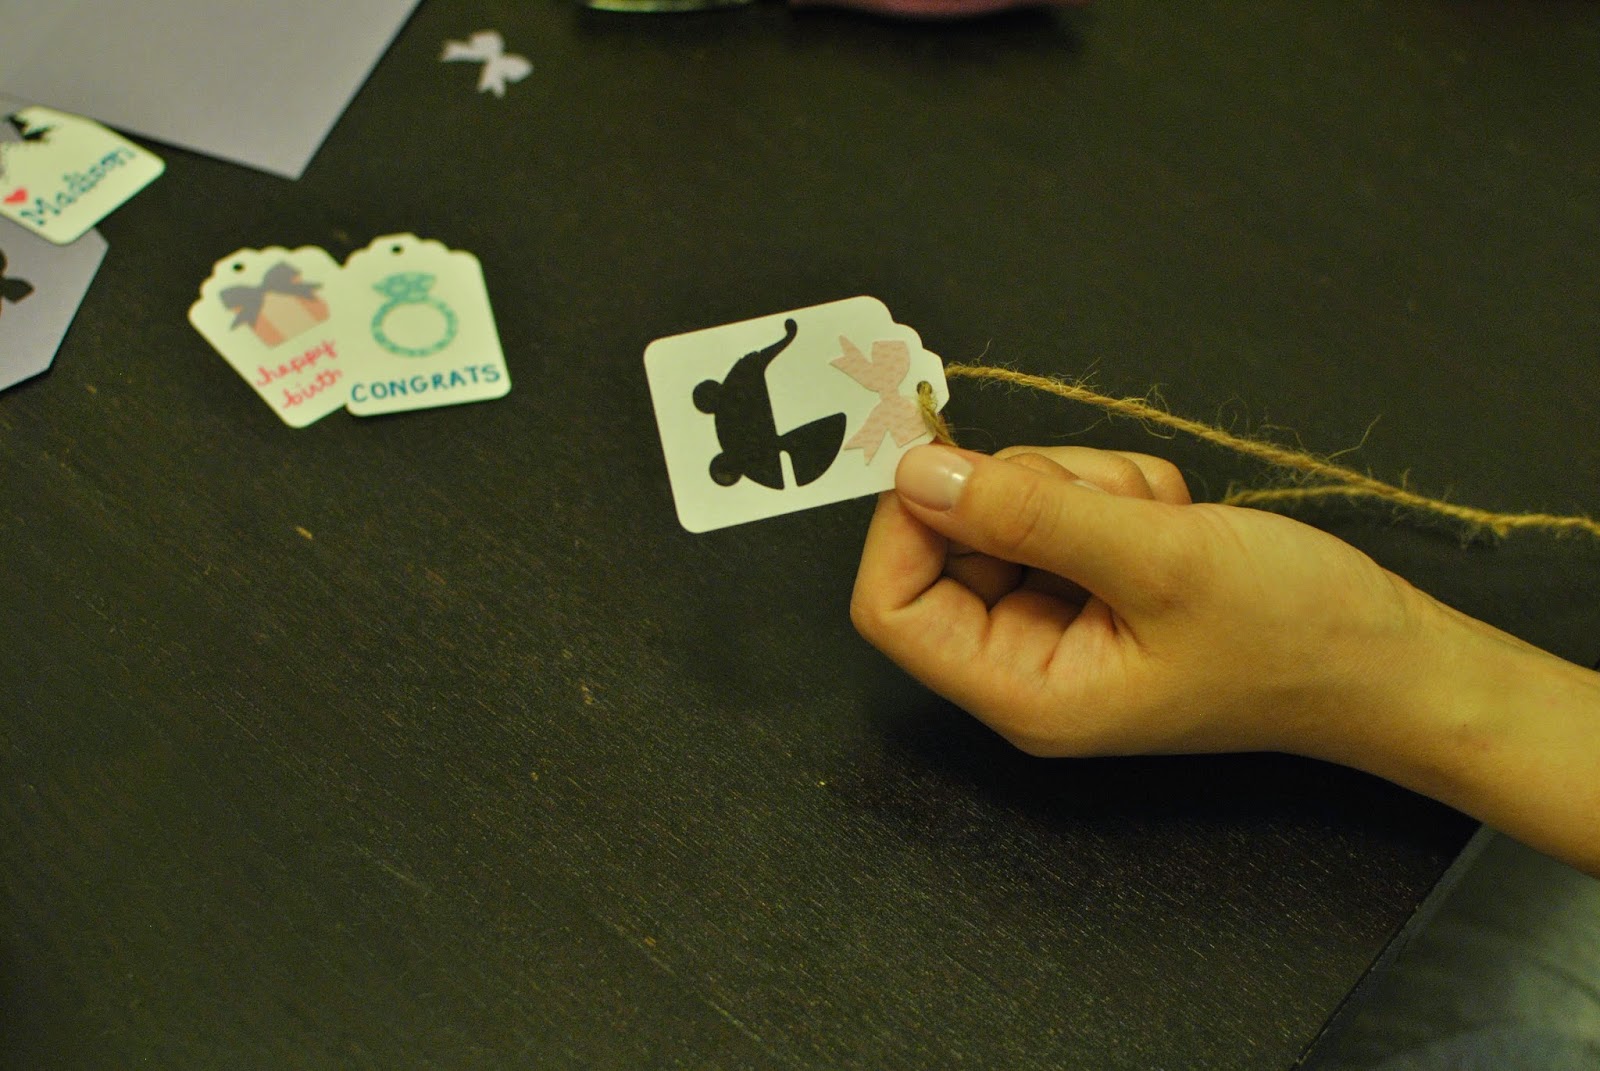
DIY Better Gift/Favor Tags


Hi, My name is Jen and I procrastinate on a professional level. When it comes to gift wrapping, I usually wait until the night before or the day of the event to wrap the gift. The only exception is Christmas where due to the sheer volume of gifts, I wrap as I buy. 

Laziness Being busy has also introduced me to gift bags. You throw in your items, add a little tissue paper, and you're done. I can't tell you how many times, in my last minute wrapping, I have noticed that the gift bag I had purchased did not have a tag. Sometimes you can get away with that. If it is a party for one person and you can just write in the card and slip that inside the bag. However, for an occasion like Christmas, where you have multiple gift recipients, it can be confusing and near impossible to remember which freshly wrapped gift goes to your sister, uncle, nephew etc. without tearing it apart or shaking it to mere destruction. 

When wrapping an actual present, I rarely have labels available. When this occurs, I am so happy that I am deeply obsessed with paper punches. They have saved the day and in my opinion are worth the price. They come in all shapes and designs from basic circles and squares to intricate and downright lovely. Below is a tutorial for personalized gift tags that can be used for any occasion depending on your tools or creative bravery. They also work great for birthday party, bridal shower, or baby shower favors. 


Supplies: 
These are the tools I used. I did leave out the stroller punch. If you're interested it is by Fiskars.
  • Tag cutout. ( To be honest, you can cut out a rectangle by hand, or purchase tags from Staples or any craft store.)
  • Paper punches to suit your occasion. (Various etsy sellers also sell the punched out shapes for around $1. This is great if you need only a few designs- such as for baby shower, or birthday party favors and don't want to spend the $5-$25 for the punch or if it is discontinued)
    • Martha Stewart: Diamond Ring
    • Martha Stewart: Bow Punch
    • EK Success: Square Punch
    • Mary Uchida: Tag Punch
  • Glue stick
  • Markers ( if you want to write names, sentiments, etc)
  • Thick Cardstock-Like paper ** I used unlined index cards which is cheaper**
  • A hole puncher 


Step 1: Cut out your tags. (Skip this is you purchased them or cut them out yourself.)


Step 2: Cut out your designs. You can either punch directly into the tag utilizing the negative space, or glue on your design. 


Step 3: Add writing if desired. 


Step 4: Punch a hole in the top of your tag with a hole puncher. This is only necessary if you are attaching with a string. You can also just tape it to your gift/favor.


 Step 5: Attach your tag to your gift or favor.


Any questions? Comment. 


Tuesday, July 15, 2014

DIY Personalized Bridesmaids Gifts: Monogrammed (Part 1)


Before I got married, I looked all over Pinterest for ideas for gifts for our bridal party. I saw some great ideas and plenty of ideas that just weren't us. It was hard and the ideas I liked didn't exactly fit into our wedding budget. I decided to take these on myself. 

I had 4 bridesmaids, 2 junior bridesmaids, and a flower girl. I also made one for my mom, my mother in law, and myself  =).

Supplies:
  • Your computer and printer
  • Font Download : Vine Monogram by Font Brothers. Please note that this license is for personal use only and can not be used to create and sell products. 
Step 1: Open up a Powerpoint Document.This will probably work in Microsoft Word, or any word processing tool. I just prefer Powerpoint because you have the flexibility of moving the text around the page. Then open up a text box by clicking Insert> text box> and then clicking on your page to open the text box.  


Step 2: Type in your monogram using the font Vine Monograms. 
* Tip * When you use this font youre going to use lowercase letters to type the first and middle initial ( the edges) and caps to type the middle initial. Here, I typed the initials in that order in standard font, and then changed it to the monogram font. 


Step 3: Adjust the font size. I found that size 80 fit nicely on these hangers. Experiment. Eyeball it and then cut it out and hold it on your hanger. 


 When you're done- print it out. Make sure you print it on regular printer paper. You will be "carving" through the paper- so thick paper will just make it harder on you. You can reuse old paper with writing on it if that is all that is available. 


Part 2: Transferring your Design onto the Hanger
Click here to see what comes next!


Questions? Comment.


DIY: Personalized Hershey Kisses (Part 1)


This is part 1 of a 2 part project. (Adding text)
To See Part Two Click Here
Personalized Kisses Pt 2 (Adding pictures)


I recently created these Hershey kiss labels as an extra detail for my favorite little man's 4th birthday party. They are easy to create and add an unexpected level of personalization when displayed on a desert table, coffee table, or when given as favors.


The best part is that they can easily be made at home relatively inexpensively the first time, and at NO COST after you have purchased the supplies.

You will need:

1. White cardstock- This one is from staples, but it can be purchased at any office supply store.

2. A glue stick: Avery permanent is my favorite because it actually stays!

3. 3/4 " paper punch: This one is by EK Success & it works very well. These can be purchased online from craft stores or on Ebay as well as inside any craftstore.

4. Your computer.


This is a step by step tutorial on how to make these for any event. These pictures will show how to add text to the labels such as "Anthony's 4th Birthday" seen in the image below.
Step 1: Open an Powerpoint Document.


Step 2: Create the shape.


Step 3: Change the background color of the circle.


Step 4:Change the size so that it fits perfectly on the Hershey kiss.
Diameter of circle = 0.8"


Step 6: To add text: Open a text box.


Step 7: Adjust your text so that it fits in the space. Adjust the shape of the text box, size of the font, and font itself.


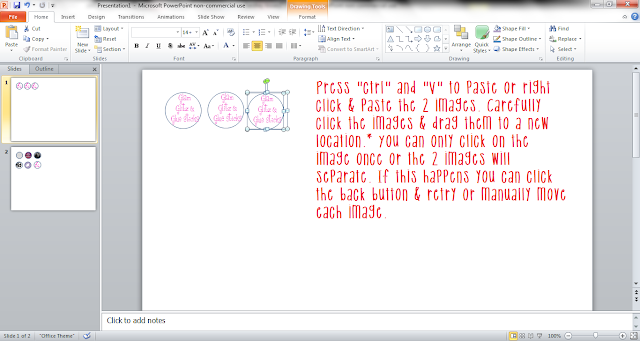
Step 8: Create duplicates by copying & pasting.


Step 9: Print your powerpoint slide on cardstock or coverstock. You will see the circle outline now, but not for long.


Step 10: Use a scissor to cut the paper into strips. Your paper punch needs to be able to reach and cover the circle.


Step 11: Cut out your creations.
The easiest way to do this part is with the 3/4 inch circle punch. Turn it upside down so you can see the paper. This gives you the most control over cutting out your image. Press the lever & cut it out. Repeat over and over until all the circles are punched out.


Here you can see the text as well as images.
The image demo will come soon. I promise its super simple.
You can add any images- your photos, cartoon characters, logos etc.


Step 12: Finally use your glue stick to glue the circle labels onto the Hershey kisses.

Hershsey Kisses Tutorial Personalized

Enjoy your chocolate.
Personalized for the blog.

This is part 1 of a 2 part project. To See Part 2 Click Here.